Sine Fine 0.2.038
Release Notes (11/02/2026)
Download Link
- Windows (0.2.035)
- Linux (coming soon)
Control Scheme
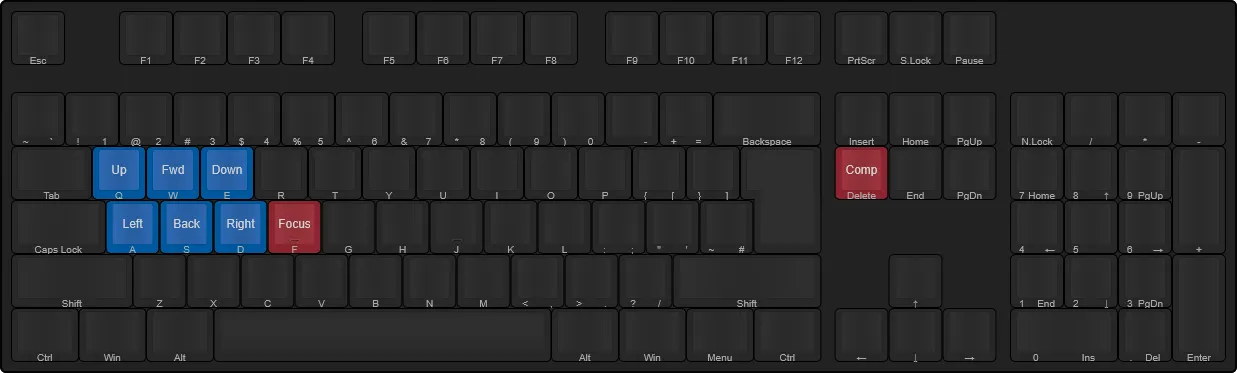
Keyboard
- Blue keys are valid in most of the game’s screens and are used to move the camera around.
- Red keys are only valid in the Ship Designer screen.
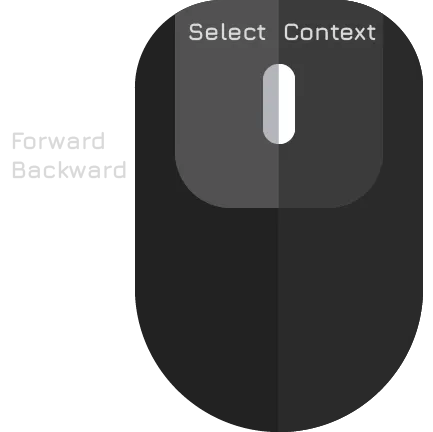
Mouse
- Right mouse button: rotates or orbits the camera.
- Middle mouse button (hold): drags the camera horizontally or vertically.
- Mouse wheel: zooms in or out.
- Left mouse button: selects an object
- Right mouse button: contextual action (currently only used to move a ship in the solar system screen)
Features
Galaxy Map
The game starts in the galaxy screen. From here you can navigate around the map (refer to the control scheme above) and inspect star systems. The other screens are accessible by clicking on the corresponding button in the bottom row.
You can navigate to the Star System screen for that star in two ways:
- By hovering your mouse next to the star in the Galaxy Screen map and then pressing the first button.
- By clicking once on a star to zoom in, and then a second time to navigate to the system screen for that star. By clicking on the star another panel with data about the star will show up.
Note: Only the Solar system is accessible at the start. To inspect other systems, refer to the Scan screen.
Ship Designer (Design)
By pressing “Design” you will be able to place various components among those available. The right-hand side panel shows a list of constraints to satisfy. Before you can save a design, you must also choose a Role from the top toolbar. Desings are saved on disk in your %USERPROFILE%\AppData\LocalLow\Vindemiatrix Collective\Sine Fine folder.
Once saved, you can press the back button (top left) to return to the galaxy screen.
Ship Builder (Assemble)
To build a ship, choose a design and a production site from the left panel. Once these two are selected you can press the Build / Add to Queue button to actually build it. In order to build it, you need to unpause the game by pressing the top-right “play” button.
Once built, the ship should appear in the solar system screen, in orbit around the planet where you built it.
Note: Some of the components are intended to be used by the larger interstellar ships. These are not yet ready.
Star System Screen
Known systems will show an “orrery”-like visualization with orbital paths. You can see the planets moving around the solar system by pressing the play button. By clicking on each planet you will focus the camera towards that planet. If you zoom in and the planet has moons, you will see them appear. If you zoom further in, you will move to a “1:1” view of that planet and you can see it rotate. You can then zoom out to return to the normal view. The outliner in the bottom right allows you to “jump” to the corresponding planet.
If you have built a ship, you should see an icon in orbit near the system. Clicking on it will make a “ship panel” appear with some more information about the ship’s current mission. At the moment you can only move it around by moving your mouse pointer to a planet and pressing the right mouse button.
Planet Screen
You can actually see planets from the surface! To do so, zoom close to a planet and a list of “Outpost Sites” will appear. By clicking on one of those you will be transported to the planet screen. You can’t do much there yet, but you can pass the time to see the movement of nearby planet. I recommend you go check the moons of planetary bodies, like Phobos or Europa so you can see the planets moving. There are various “observation” spots around the Solar System.
Note: All surface locations at the moment have the same terrain features.
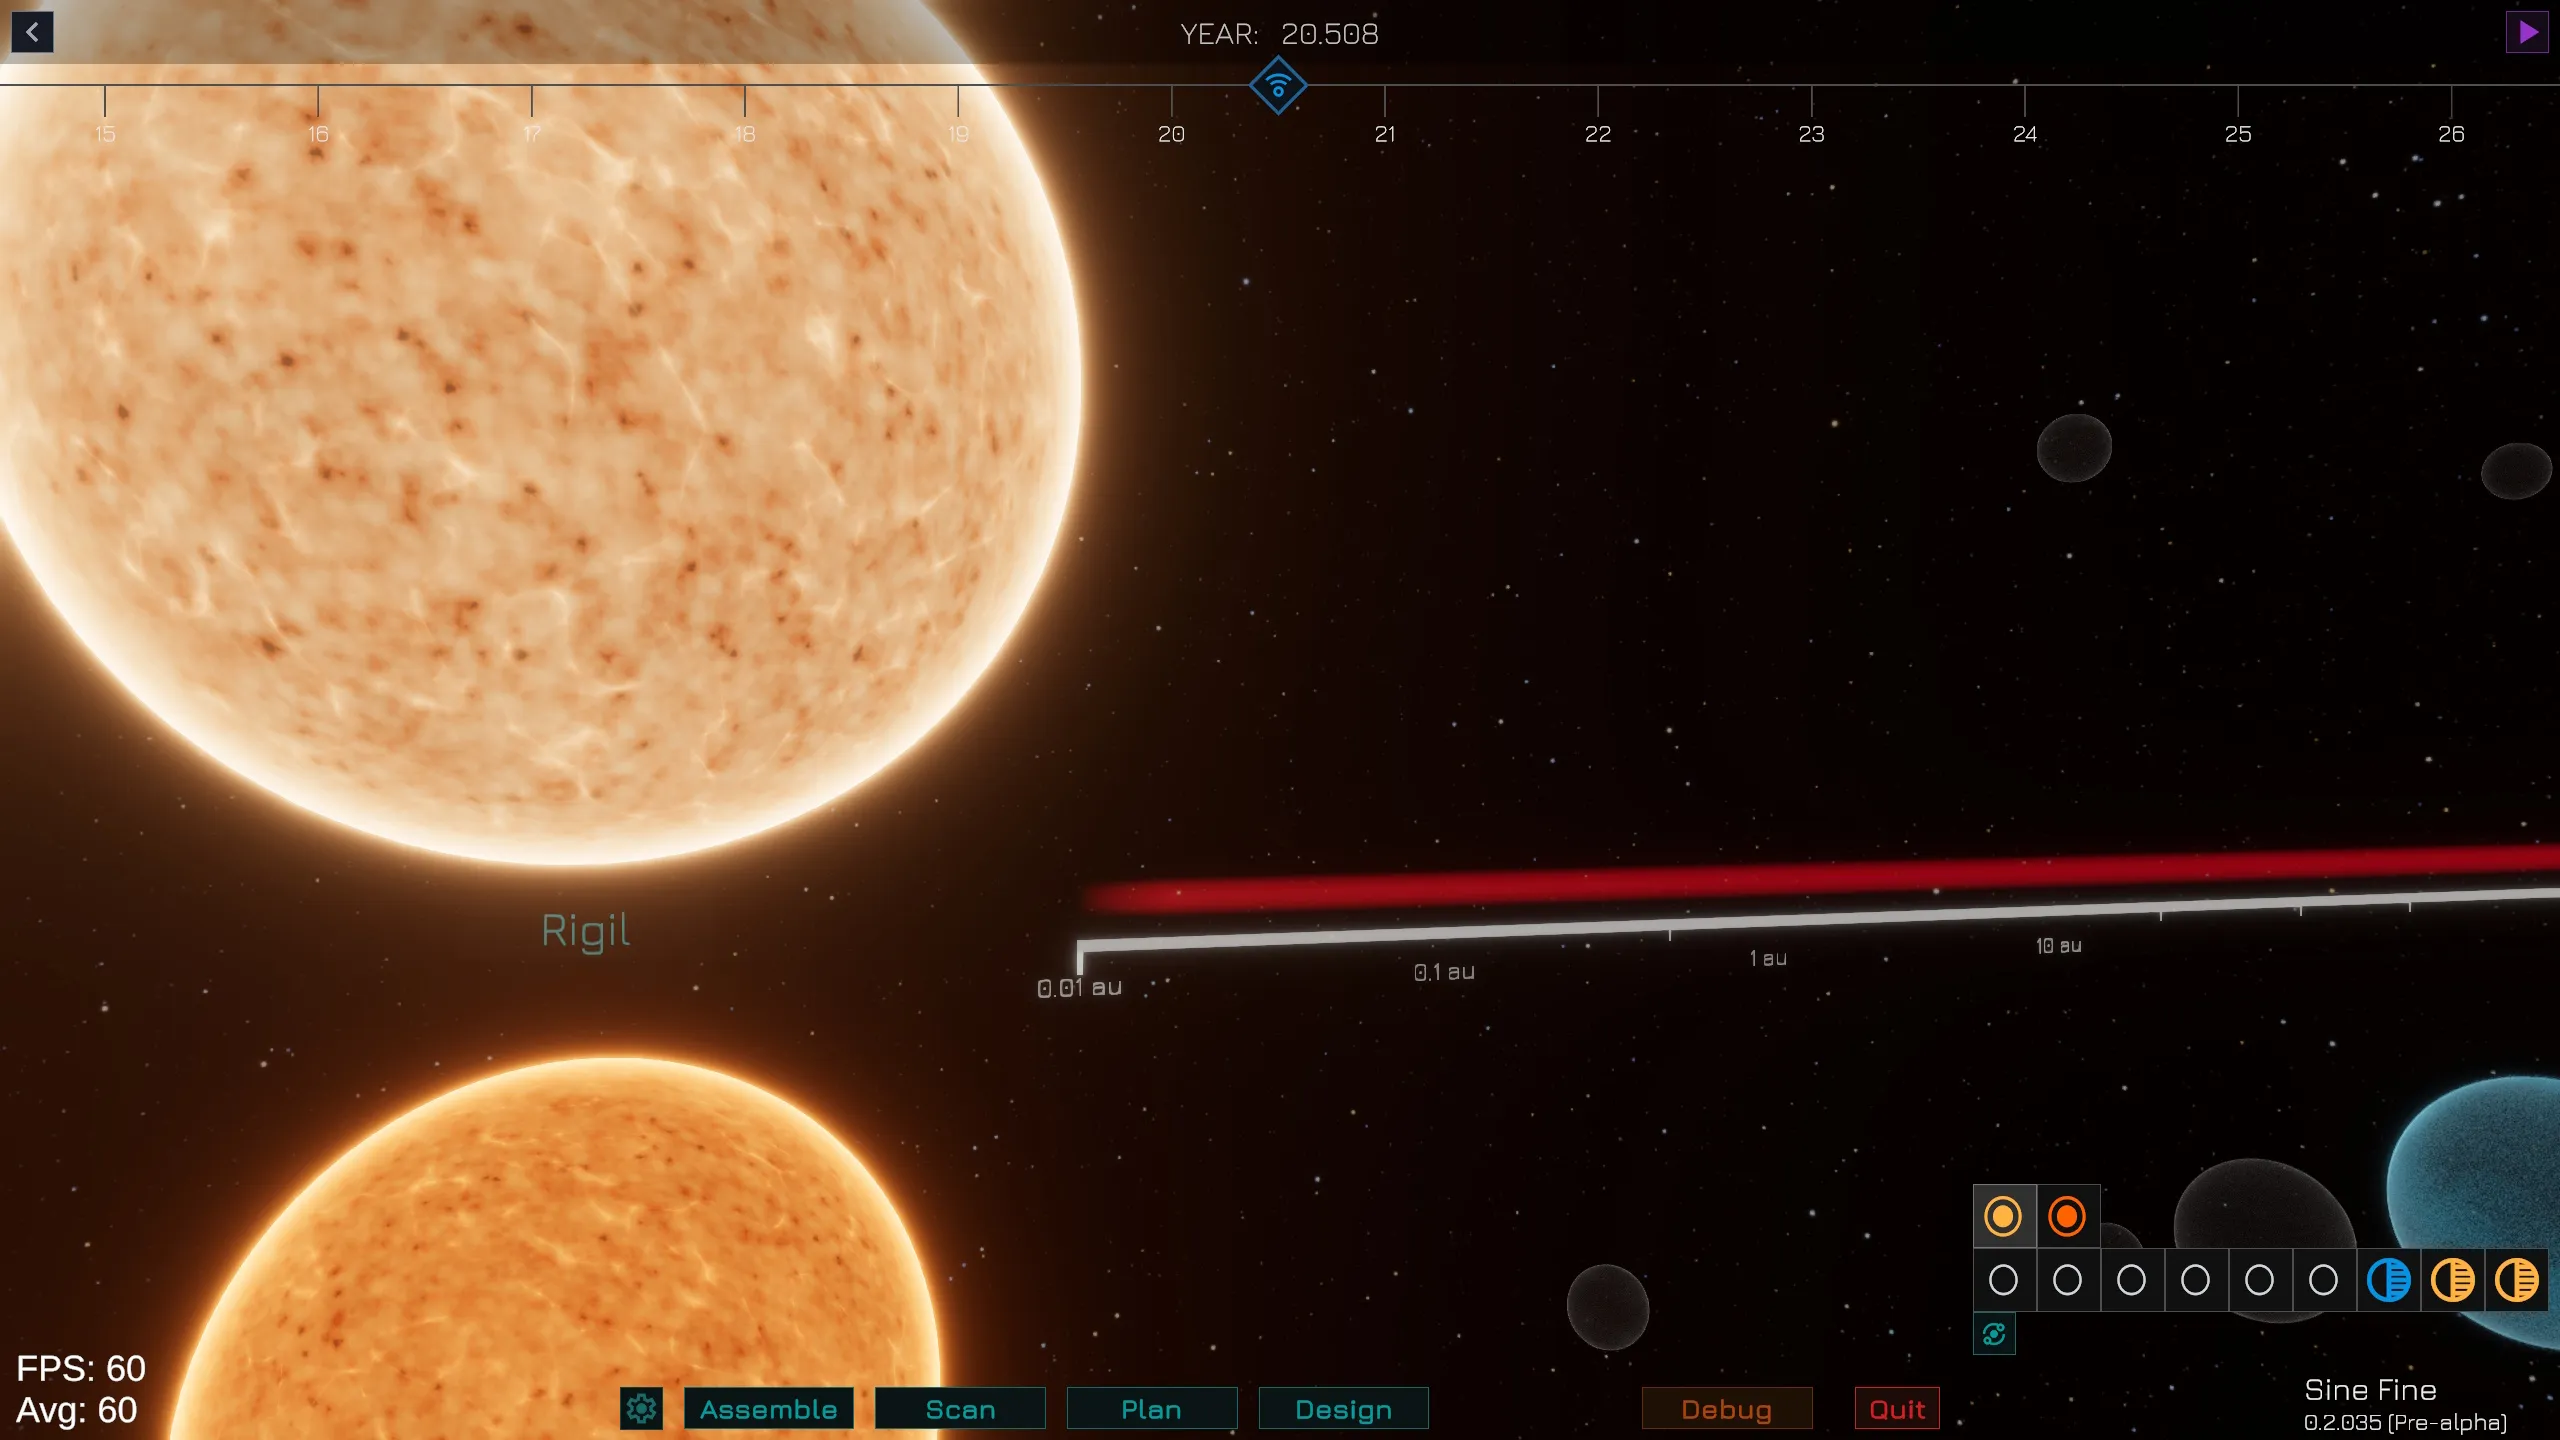
Scan Screen (Scan)
This will be the initial starting point of the game. You will need to scan systems (and further on, build the infrastructure that allows you do that). You can search for nearby star by activating this screen. The first button on the left focuses the map on that star. The Scan button, activates the scan process. Press play to pass some time.
After the process is complete, an “event window” will show up. Now, you can hover next to the star you scanned from the galaxy map and a new button should appear. This enables you to inspect that systems. Systems that have not been explored will be visualised with a “fixed view”, with the planets side by side. This is to illustrate the idea that you have not explored them yet so the data might be uncertain. In the future, the planets you will actually see will depend on your technology level and infrastructure.
You can move around this screen with the usual countrol and use the outliner to jump to a planet. In case of a multiple star system, the icons in the first row represent the different stars in the system and you can click on those to show the corresponding planets in the outliner.
Note: Many stars in the game’s database are lacking some information, such as physical parameters that enable the procedural generation system to generate the planets for that star. You will see an error message in the outliner if that is the case. Let us know in the discord which stars do not work!
Known Issues
At the moment the event window will only display the first time. Since there is no UI to allow you to specify which events to be notified of, this has been left like so. When an event completes, the game will still pause, though. Look in the timeline control in the top row and the play button.
Transitions between screens are not implemented and are a bit rough at the moment. If the game does not actually crash then it is still loading!
There will surely be other bugs for you to find. If you find one, report them on our discord!
Roadmap
Coming soon!